AutoPTS on Linux
This tutorial shows how to setup AutoPTS client on Linux with AutoPTS server running on Windows 10 virtual machine. Tested with Ubuntu 20.4 and Linux Mint 20.4.
You must have a Zephyr development environment set up. See Getting Started Guide for details.
Supported methods to test zephyr bluetooth host:
Testing Zephyr Host Stack on QEMU
Testing Zephyr Host Stack on native_sim
Testing Zephyr combined (controller + host) build on Real hardware (such as nRF52)
For running with QEMU or native_sim, see Running on QEMU or native_sim.
Setup Linux
Install nrftools (only required in the actual hardware test mode)
Download latest nrftools (version >= 10.12.1) from site https://www.nordicsemi.com/Software-and-tools/Development-Tools/nRF-Command-Line-Tools/Download.
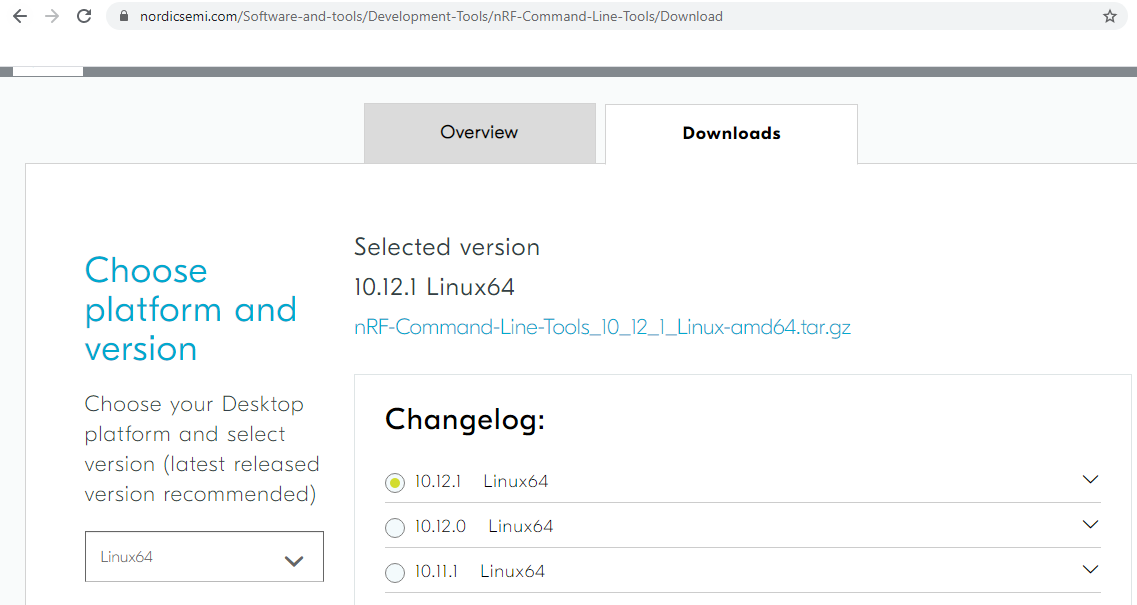
After you extract archive, you will see 2 .deb files, e.g.:
JLink_Linux_V688a_x86_64.deb
nRF-Command-Line-Tools_10_12_1_Linux-amd64.deb
and README.md. To install the tools, double click on each .deb file or follow instructions from README.md.
Setup Windows 10 virtual machine
Choose and install your hypervisor like VMWare Workstation(preferred) or VirtualBox. On VirtualBox could be some issues, if your host has fewer than 6 CPU.
Create Windows virtual machine instance. Make sure it has at least 2 cores and installed guest extensions.
Setup tested with VirtualBox 6.1.18 and VMWare Workstation 16.1.1 Pro.
Update Windows
Update Windows in:
Start -> Settings -> Update & Security -> Windows Update
Setup static IP
WMWare Works
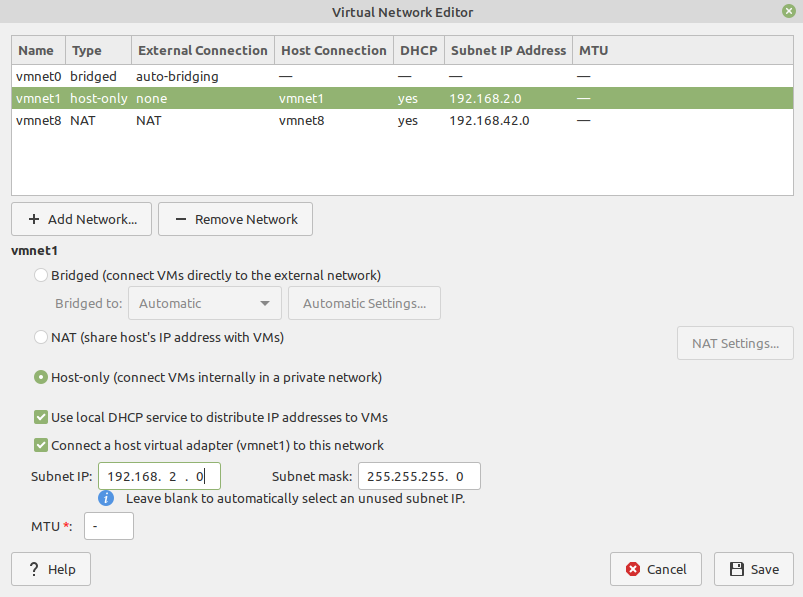
On Linux, open Virtual Network Editor app and create network:
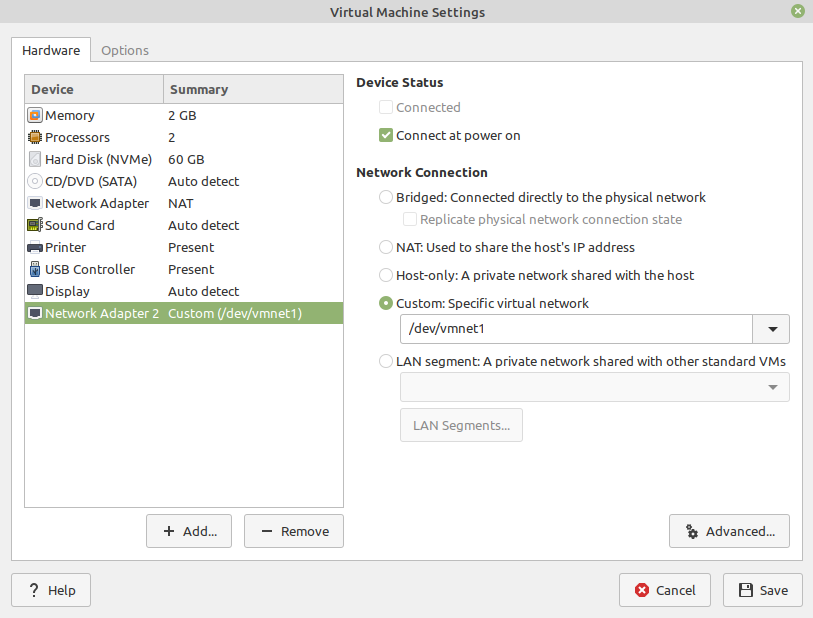
Open virtual machine network settings. Add custom adapter:
If you type ‘ifconfig’ in terminal, you should be able to find your host IP:

VirtualBox
Go to:
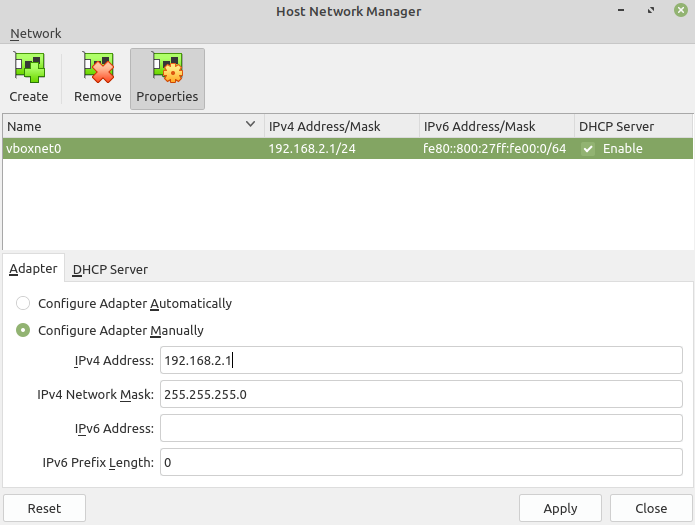
File -> Host Network Manager
and create network:
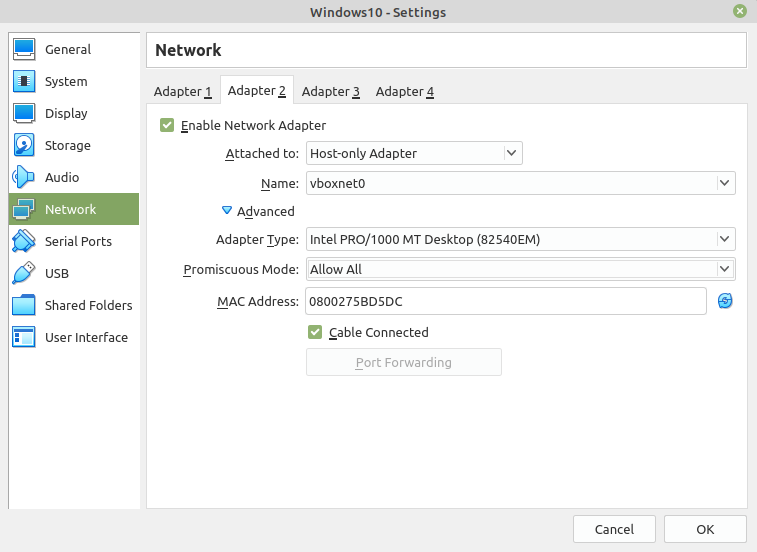
Open virtual machine network settings. On adapter 1 you will have created by default NAT. Add adapter 2:
Windows
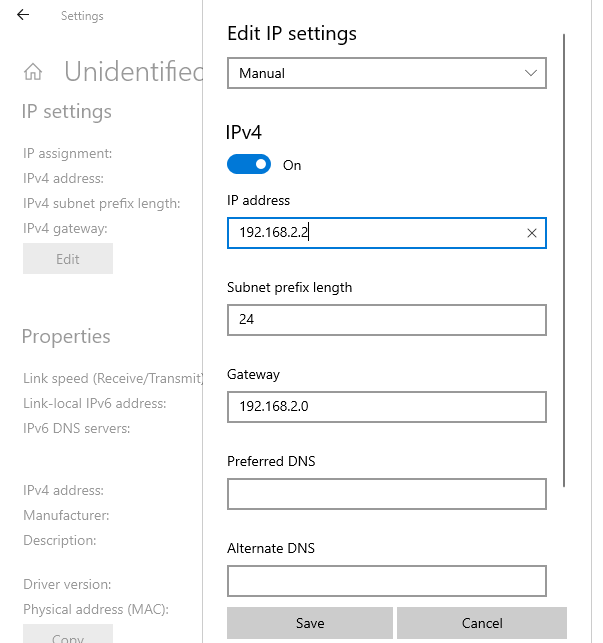
Setup static IP on Windows virtual machine. Go to
Settings -> Network & Internet -> Ethernet -> Unidentified network -> Edit
and set:
Install Python 3
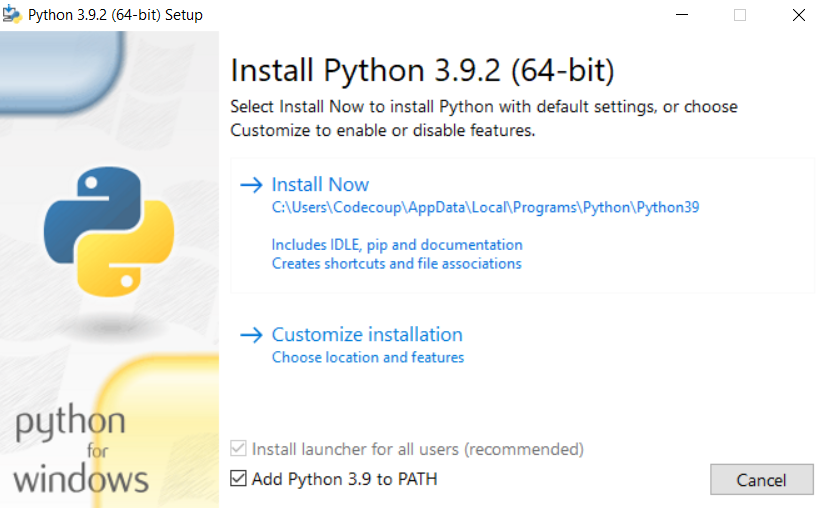
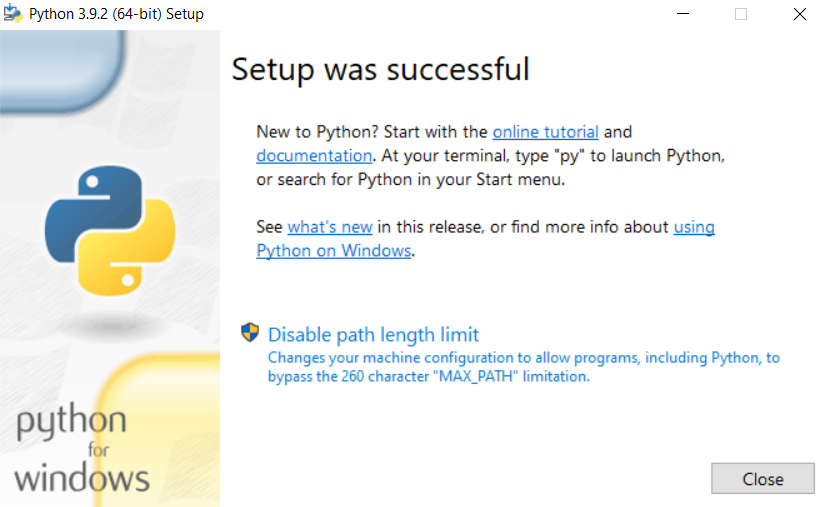
Download and install latest Python 3 on Windows. Let the installer add the Python installation directory to the PATH and disable the path length limitation.
Install Git
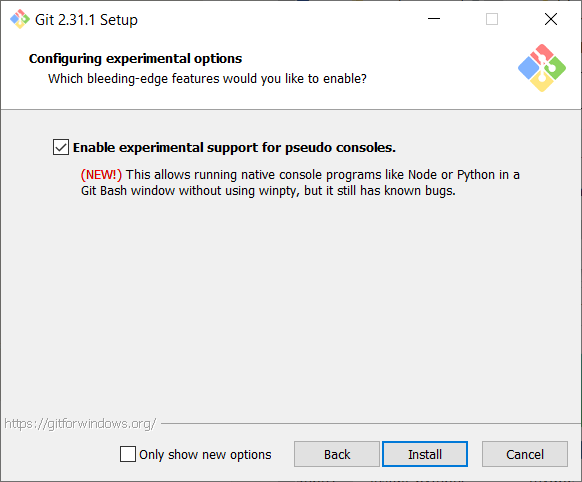
Download and install Git. During installation enable option: Enable experimental support for pseudo consoles. We will use Git Bash as Windows terminal.
Install PTS 8
On Windows virtual machine, install latest PTS from https://www.bluetooth.org. Remember to install drivers from installation directory “C:/Program Files (x86)/Bluetooth SIG/Bluetooth PTS/PTS Driver/win64/CSRBlueCoreUSB.inf”

Note
Starting with PTS 8.0.1 the Bluetooth Protocol Viewer is no longer included. So to capture Bluetooth events, you have to download it separately.
Connect PTS dongle
With VirtualBox there should be no problem. Just find dongle in Devices -> USB and connect.
With VMWare you might need to use some trick, if you cannot find dongle in VM -> Removable Devices. Type in Linux terminal:
usb-devices
and find in output your PTS Bluetooth USB dongle

Note Vendor and ProdID number. Close VMWare Workstation and open .vmx of your virtual machine (path similar to /home/codecoup/vmware/Windows 10/Windows 10.vmx) in text editor. Write anywhere in the file following line:
usb.autoConnect.device0 = "0x0a12:0x0001"
just replace 0x0a12 with Vendor number and 0x0001 with ProdID number you found earlier.
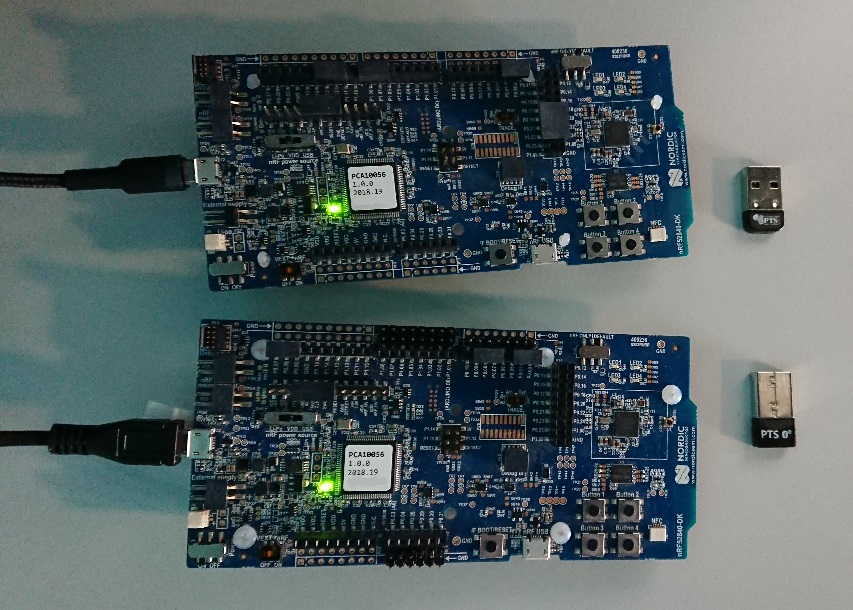
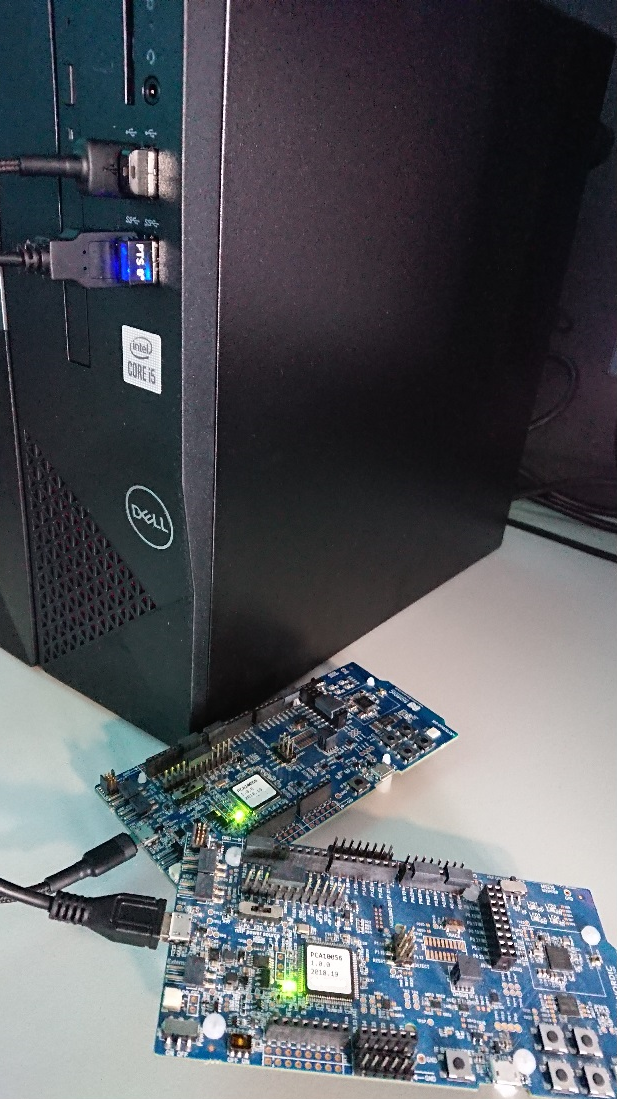
Connect devices (only required in the actual hardware test mode)
Flash board (only required in the actual hardware test mode)
On Linux, go to ~/zephyrproject. There should be already ~/zephyrproject/build directory. Flash board:
west flash
Setup auto-pts project
AutoPTS client on Linux
Clone auto-pts project:
git clone https://github.com/auto-pts/auto-pts.git
Install socat, that is used to transfer BTP data stream from UART’s tty file:
sudo apt-get install python-setuptools socat
Install required python modules:
cd auto-pts
pip3 install --user wheel
pip3 install --user -r autoptsclient_requirements.txt
Autopts server on Windows virtual machine
In Git Bash, clone auto-pts project repo:
git clone https://github.com/auto-pts/auto-pts.git
Install required python modules:
cd auto-pts
pip3 install --user wheel
pip3 install --user -r autoptsserver_requirements.txt
Restart virtual machine.
Running AutoPTS
Server and client by default will run on localhost address. Run server:
python ./autoptsserver.py

Testing Zephyr Host Stack on QEMU:
# A Bluetooth controller needs to be mounted.
# For running with HCI UART, please visit: https://docs.zephyrproject.org/latest/samples/bluetooth/hci_uart/README.html#bluetooth-hci-uart

python ./autoptsclient-zephyr.py "C:\Users\USER_NAME\Documents\Profile Tuning Suite\PTS_PROJECT\PTS_PROJECT.pqw6" \
    ~/zephyrproject/build/zephyr/zephyr.elf -i SERVER_IP -l LOCAL_IP
Testing Zephyr Host Stack on native_sim:
# A Bluetooth controller needs to be mounted.
# For running with HCI UART, please visit: https://docs.zephyrproject.org/latest/samples/bluetooth/hci_uart/README.html#bluetooth-hci-uart

west build -b native_sim zephyr/tests/bluetooth/tester/ -DEXTRA_CONF_FILE=overlay-native.conf

sudo python ./autoptsclient-zephyr.py "C:\Users\USER_NAME\Documents\Profile Tuning Suite\PTS_PROJECT\PTS_PROJECT.pqw6" \
    ~/zephyrproject/build/zephyr/zephyr.exe -i SERVER_IP -l LOCAL_IP --hci 0
Testing Zephyr combined (controller + host) build on nRF52:
Note
If the error “ImportError: No module named pywintypes” appeared after the fresh setup, uninstall and install the pywin32 module:
pip install --upgrade --force-reinstall pywin32
Run client:
python ./autoptsclient-zephyr.py zephyr-master ~/zephyrproject/build/zephyr/zephyr.elf -t /dev/ACM0 \
    -b nrf52 -l 192.168.2.1 -i 192.168.2.2

At the first run, when Windows asks, enable connection through firewall:

Troubleshooting
“After running one test, I need to restart my Windows virtual machine to run another, because of fail verdict from APICOM in PTS logs.”
It means your virtual machine has not enough processor cores or memory. Try to add more in settings. Note that a host with 4 CPUs could be not enough with VirtualBox as hypervisor. In this case, choose rather VMWare Workstation.
“I cannot start autoptsserver-zephyr.py. I always got error:”
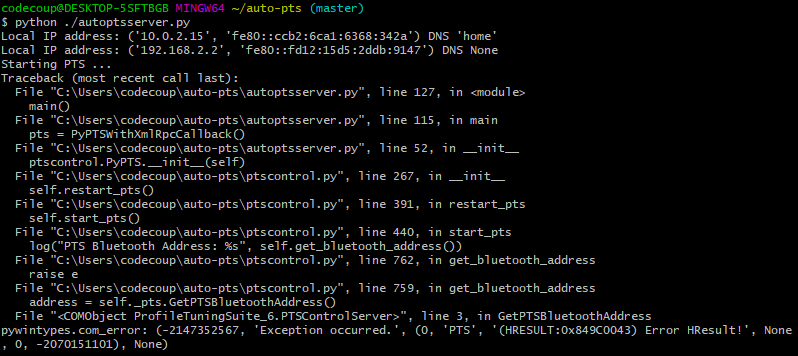
One or more of the following steps should help:
Close all PTS Windows.
Replug PTS bluetooth dongle.
Delete temporary workspace. You will find it in auto-pts-code/workspaces/zephyr/zephyr-master/ as temp_zephyr-master. Be careful, do not remove the original one zephyr-master.pqw6.
Restart Windows virtual machine.
